 |
| GunnD_Easy |
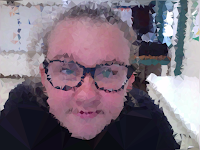
Facial expressions are universal. I read an article on google called ''
Six Universal Expressions." It talked about a research study that put six facial expressions which match to particular universal emotions such as being happy, being sad, being surprised, filled with anger, disgust, joy, or fear. This article even had examples of all of these expressions.
Happy, your usually smiling.
Surprised, your eyes are big and wide.
Sad, tears rolling down your face.
Mad crinkled up nose and eyebrows, and your face gets really red.
Fear, your eye brows are raised, your mouth is slightly open, your teeth are cliched together, and your eyes are wide. And
Disgust, your check and lip are raised, and your nose is crinkled.
 |
| GunnD_Poly-1 |
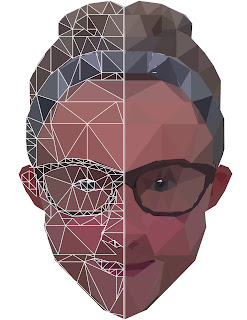
Step One: Take a portrait of yourself. Set up or prepare your project. Width 8.5 in. Height 11 in. Resolution 300 p/i. Next upload that image to Photoshop. Fit your portrait into your work space. Then hold SHIFT down so you don't mess up your portrait and make yourself look like you just ate a whole carton of ice-cream. Once you fit your portrait to a good stopping point press
COMMAND S or File > Save as >your document
Step Two: Then set up your grid. Go to View> Show> Grid. Then View>Snap to> Grid.
Step Three: Make an outline. Use the line tool, cut through the middle of your portrait, and outline the left side of your portrait all the way to the line separating the left and right side. Press
COMMAND S or File > Save as >your document
Step Four: Outline the triangles. This takes time and patients. Using the line tool make a bunch of triangles in the portrait (good sized ones) Once your done you will notice that you have a bunch of shapes where all your layers go, select the top of and hold shift scroll all the way to the bottom still holding shift and select the bottom one then right click with your mouse and click merge layers. Name that Outline so you don't get confused. press
COMMAND S or File > Save as >your document
Step Five: Fill the triangles with color. Take your portrait layer and press the lock, then press
Command J. Name that Low Poly. Once your on that layer use the polygonal lasso tool and outline a triangle go to Filter> Blur>Average.Repeat this process until each triangle is filled instead of going to Filter> Blur>Average each time press
Command F. Create another layer and use the paint bucket tool and use white click on the screen. That's your background. press
COMMAND S or File > Save as >your document
Step Seven: Almost done. Duplicate and flip the image. You are on your Low poly layer
Command J to copy it. Flip it so that you have a low poly image on both sides. Make sure you fit it correctly and move it where its touching each other so there is no white line down the middle. Now press
COMMAND S or File > Save as >your document save it as a JPG though because you are all finished.
with all your triangles filled with color press
 |
| GunnD_Poly-2 |
 |
| GunnD_Poly-3 |
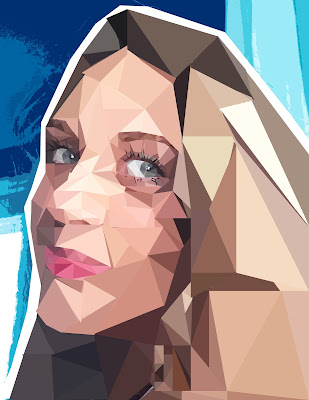
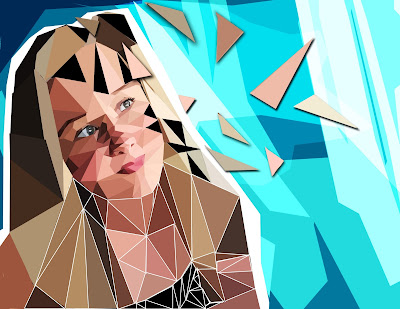
The difference between my Poly-1 and my Poly-2 is that each poly project got better my Poly-1 is okay but I could have improved on somethings in that project. But my Poly-2 is my best one yet. The same things in my Poly Portraits project is that We still used the same tools like the polygonal lasso tool and the move tool but we didn't use the eye dropper tool in Poly-1 because we used Filter> Blur> Average. But I really like how I did my head band in Poly-1 because I liked how I made them different colors but I could have improved on actually making triangle in my Poly-1. Of course there are the good and bad parts about what turned out good and what didn't. I really like how detailed the eyes were in my Poly-2 and how I spent a lot of time on them, I didn't like really how the hair turned out but that's okay if I do this project again I would spend more time on the not so important parts like we did on the more important parts.


